
The Standard Wall Mount is a mounting accessory from Starlink that allows you to permanently install your Gen 3 dish to an exterior wall, eave, or fascia. Starlink has simplified their mounting options for Gen 3, opting to combine the previous Short and Long Wall Mount’s from Gen 2, into just one product for their next generation dish. The Standard Wall Mount combines the features from previous versions, with some interesting new additions for Gen 3.

If you are looking to mount the Gen 3 Standard dish to your home, the Standard Wall Mount is one of the only options from Starlink. In my opinion, it’s the mount most people will use, so I wanted to get my hands on it for a review. In this post, I will cover all the details of the Standard Wall Mount. I will also be going step-by-step through the installation process. Finally, I will share my review and impressions, and let you know if I recommend the mount.
Table of Contents
Overview
Starlink’s Standard Wall Mount is designed to be installed on a vertical surface, such as a wall or roof fascia board. The mount includes a short mast that elevates the Starlink dish above the roof. A mounting plate in the kit replaces the kickstand that comes pre-installed on the dish.
The mount can accommodate up to a 4 inch overhang. If your roof has more than that, you will need to install it on the fascia. For roofs with less than 4 inches of overhang, you can opt to install it on the exterior wall or fascia. In any case, all Starlink mounts work best when installed at the highest possible location on the roof.

All the materials are weather resistant, and the mount is designed to withstand high winds. The mast can rotate 360 degrees to allow for aiming the Gen 3 dish. A knob and locking mechanism prevents the dish from rotating after the initial alignment.
The mount secures to the wall or fascia with two included lag screws. Cable management is easy, thanks to integrated cable routes and the 20 included cable clips.
Price
The Standard Wall Mount costs $55. It is available for purchase directly from Starlink. You can shop for the Standard Wall Mount, or other Gen 3 accessories, by visiting the Starlink shop.
Contents of the Standard Wall Mount kit

The contents of the Standard Wall Mount kit make installation pretty simple. It comes with almost everything you need, like lag screws, silicone sealant, and cable management clips. Here is what comes in the box:
- Mast
- Mast Adapter
- Wall Mount
- Wall Mount Cover
- Silicone Sealant
- Lag Screws x 2
- Cable Clips x 20
- Installation Instructions
Installation Tutorial
Now that you have a better idea of what the Standard Wall Mount is, let’s go over the installation process. The instruction sheet included in the kit isn’t very detailed, so I created a tutorial video and text guide to show all the steps involved. You can watch the video version, or follow the tutorial in this post.
Video Tutorial
Note: Some ad blockers will block our video player. If you don’t see the video, try disabling your ad blocker, and then reload the page.
Tools needed

In addition to the contents of the kit, you will need the following tools:
- 1/4″ drill bit
- Drill
- 9/16 or 14mm socket wrench
- Marking pencil
- Level
Step 1: Find a good mounting location

The key to installing Starlink is finding a good mounting location. First, download the Starlink app. When you open the app, you can use the obstruction scanning tool to evaluate potential mounting locations. You will need to stand on your roof, near the location you want to install Starlink. In general, it’s best to install the dish as high on the roof as possible, ideally at the peak.

Trees and other obstructions will impact the performance of your connection. I don’t recommend continuing until you find a suitable spot, according to the Starlink app. You can read more about obstructions and finding a good mounting location in this post.
A maximum of 4 inches of overhang is allowed if you are installing the dish on a wall. If your roof extends more than 4 inches beyond the wall, you will need to install the mount to the fascia board. In any case, make sure you place the mount high enough so that the dish can clear the roof. The dish will sit about 11 inches from the very bottom of the mount.
Step 2: Mark the pilot hole locations

It’s important to drive the lag screws into a structural part of the wall or roof. If you are installing the mount to a wall, a stud finder might be helpful to locate the position of studs. If installing to the fascia, verify there is solid wood behind any flashing or other material on the fascia.
When you’ve found a good location, it’s time to install the mount. Start by holding the mount up to the wall/fascia with a level. Mark the location of two pilot holes with a marking pencil, using the two holes on the back of the mount as a template. Make sure you hold the mount level as you make the marks.
Step 3: Drill the pilot holes

With the pilot hole locations marked, use a drill and 1/4″ bit to drill two pilot holes.
Step 4: Secure the mount with lag screws

Double check that the pilot holes are in the correct position by holding the mount back up to the wall/fasica. If the holes align with the mounting holes, you can proceed. Before installing the lag screws, apply the included silicone sealant to each hole. Direct sealant into the pilot holes, and apply some around the hole as well.

Take one of the lag screws and drive it most of the way in to the bottom mounting hole. Use a 9/16″ or 14mm socket and wrench. With the bottom lag screw most of the way in, take the wall mount and slide it on to the lag screw, making sure to line up the top pilot hole with the top hole on the mount. Snug down the bottom lag screw to hold the mount in place.
With the bottom lag screw snug, double check that the mount is level. Install the top lag screw. Check for level again. If level, finish tightening both lag screws.
Step 5: Assemble the mast

Back on the ground, assemble the mast by snapping the mounting plate to the mast. It only goes one way. There are four locking tabs that will snap together when you insert the mast into the mounting plate. It’s very hard to separate them again, so only do this when you are ready to install the mount.

Once the mast is installed on the mounting plate, take either end of the Gen 3 Starlink cable and feed it through the slot near the bottom of the mast. Feed the cable up through the top of the mounting plate. You’ll notice a cable channel in the mounting plate, where the cable exits toward the more narrow side.
Step 6: Install the mast adapter to the Gen 3 dish

Remove the kickstand from the Gen 3 dish by pulling up on the tab with one hand, and pulling straight out on the kickstand with your other hand. With the kickstand out of the way, you can see the Starlink cable connector. Connect the Starlink cable to the dish with the same end that you routed through the mast. The tab of the cable connector should point up. Make sure the cable seal is flush, and that the cable is fully inserted into the connector.

With the cable connected, slide the mounting plate into position, making sure to not pinch the cable. The mounting plate should snap and lock into place. At this point, the mast should be secure to the dish, and the remaining cable should be routed out of the notch near the bottom of the mast.
Step 7: Install the mast on the mount

Take the other end of the Starlink cable back up to the mounting location. Feed the cable through the hole on the top of the mount (not the mast hole). Pull as much cable slack as you can through the hole in the mount, down through the bottom of the mount.

Next, carry the dish up to the mount. Insert the mast into the mount. If the mast resists, loosen the knob on the mount. With the mast inserted, pull any remaining cable slack down through the bottom of the mount. Don’t worry about tightening the mast adjustment knob yet. Install the cover plate to the bottom of the mount when you have finished pulling all the cable through. The cable will sit in the notch of the cover plate.
Step 8: Route the Starlink cable

Route the Starlink cable into your house. The easiest way to do this is to use the Starlink Cable Routing Kit. You can also use existing conduit or holes if available. The Starlink cable connector requires a 3/4″ opening. Make sure to protect the connector from damage as you pass it thought the wall.
You can loop excess cable inside or outside, whichever you prefer. I do recommend installing a drip loop on the outside of the house, below where the cable enters. The Gen 3 Standard kit comes with a 50′ cable, but a 150′ cable is available if you need additional length.

Use the included cable clips to secure the Starlink cable down the side of your house.
Step 9: Boot up Starlink
At this point, you should have the mount installed, with the Gen 3 dish placed on the mount. The Starlink cable is connected to the dish and routed down and through an exterior wall. Now, it’s time to power up the dish so you can align it correctly.
Plug the Starlink cable into the Gen 3 router. Plug the power supply into the Gen 3 router. Then, plug in the AC power cord to boot everything up. It takes about 5-15 minutes for Starlink to boot up.
After waiting several minutes, connect to the Starlink Wifi network with your phone. If you haven’t already set a password, the Wifi network will be named STARLINK. Upon connecting, your phone might prompt you to change the network name and password. It’s a good idea to set up a password, but you can also do this later in the Starlink app if you wish.
Once connected to the Starlink Wifi network, open the Starlink app. Make sure you are logged in to your account. You can tap the profile icon in the upper right corner if you need to sign in. The status should indicate Online. If you are Offline, you can check our troubleshooting guide for help.
Step 10: Align the dish
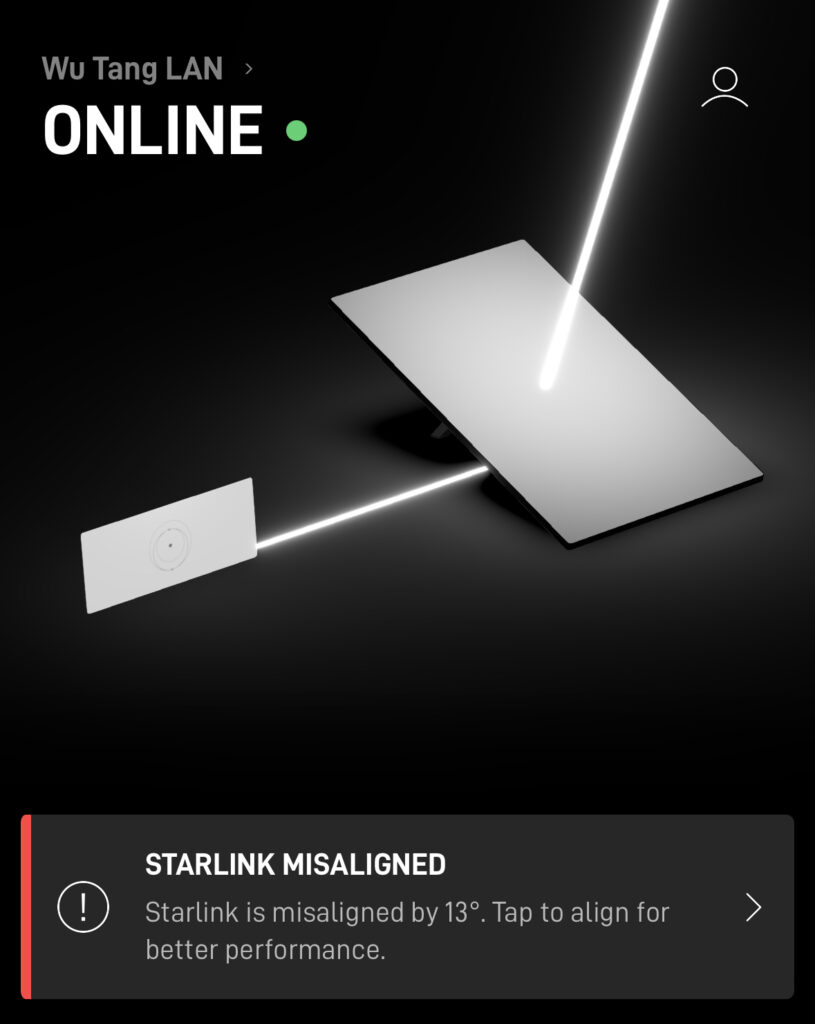
If you see the error message Starlink Misaligned, you will need to manually rotate your dish. Climb up to where your dish is located with your phone. Open the alignment tool in the Starlink app by clicking on the Starlink Misaligned message, or by tapping the Alignment menu item.

Rotate the dish according to the alignment tool. The app will let you know when your dish is rotated in the correct direction. Once properly aimed, tighten the adjustment knob on the mount. Installation of the Gen 3 Standard Wall Mount is now complete!
Review

The Gen 3 Standard Wall Mount from Starlink is well designed, and pretty easy to install. The important parts of the mount are made of weather resistant metal, including the mast and wall mount. The mounting plate, that slides into the dish, is made of sturdy plastic. I find the Gen 3 mounting system to be pretty easy, with mounts just sliding and snapping into place, with no other physical fasteners required.
In my opinion, the Standard Wall Mount will be the most common and useful mount for the vast majority of Starlink customers wishing to permanently install the Gen 3 dish to their home. It’s a versatile option that can be installed to the wall or fascia. Installing to the side of the house, rather than directly into the roof, helps you to avoid leaks in the future.
Things I liked
- The kit includes all the mounting hardware required for installation
- The mast is easily rotated and lockable for a simple aiming process
- All components are made from quality materials
- Produces a clean, professional looking installation
Things I didn’t like
- The Standard Wall Mount can only accommodate a 4″ overhang for wall applications
- Even when the mast adjustment knob is fully tightened, the dish and mast has some play and movement. Although this won’t impact performance, it just seems like the mast should feel more stable
- No options for a mast extension if you need additional height
Final thoughts

Overall, I highly recommend the Starlink Standard Wall Mount if you are planning to permanently install a Gen 3 dish at your home. Although most people will be limited to mounting to the fascia, it still provides an easy and good mounting location to get your Starlink dish above trees and other obstructions. At $55, this next generation mount is competitively priced to aftermarket options, and has the benefit of being plug and play with the Gen 3 dish.
I’d love to answer your questions and hear your feedback. Leave a comment below, and make sure to let me know what other Gen 3 topics you want me to cover. Thanks for reading!
Be sure to check out all the other Starlink mounting options.
Really sucks that there’s absolutely no option for a mast extension for the standard wall mount. I thought I had confirmed that it would clear, so I drilled holes and put in the lag bolts only to find I need about another 2″. I’ll probably end up cutting the mast in half and extending it using a pipe.
It does look like pretty decent kit. A few questions came to mind. (1) Did you happen to take measurements on the spacing of the lag screws? (2) what is the overheight clearance needed on the base that attaches to the facia. I think my facia is 6.5 or 7 in about. Wondering if the of the bottom of the mount might overhang a little. (3) agree I wish they had an alternative mast extension, to allow for more height. (4) if you use aftermarket (say a Proxicast) j mount. Does starlink have some type of mast adapter? otherwise how else would 3rd party mount actually attach to the Gen3. Thanks for great articles. I just need winter snow melt, then I can order and install my SL
I didn’t grab that measurement, but it’s less than 3 inches. From the base of the mount to the roof, you can have up to 11 inches before you risk hitting the dish. That’s the lower part of the dish. You’ll have more clearance if your dish points in a direction where the lower part doesn’t risk hitting the roof. If your fascia is more than 4 inches, the mount will fit just fine. It doesn’t have a big footprint at all. When using an aftermarket mount or pole, Starlink sells a “Pipe Adapter” accessory that adapts the Gen 3 to any pole/mast up to 2.5″ in diameter. I have a review coming, using a Proxicast J-mount.
I just measured mine. The portion of the mount that contacts wall/facia is about 2 3/4″ tall. The bolts will be about 2″ apart. Both of the bolt holes are oblong.
In regards to the Proxicast J-mount, which is all aluminum, I am looking forward to the review using the pipe adapter on one. The bolt that lock locks the antenna in place contacts the mount a 1/4 to 3/8″ from the top of the mast. My gut tells me a thin wall mount or soft metal such as aluminum mount will deform and prevent a long term snug fit. I intend to not install them until reports come in from other installers. I don’t want MY customers to be the beta testers for this mount…
Thanks for the measurements! I agree about the Gen 3 Pipe Adapter. It’s not a great design IMO, but I haven’t really done my full review yet to find out. There just isn’t much area where the single screw can grip the pipe/pole. The Gen 2 Pipe Adapter had 6 set screws and felt very secure. Gen 3 just has one screw, and only bites maybe an inch or so of the pipe. Like you said, I’m worried that tightening the Pipe Adapter using a single screw will result in too much pressure on the J-mount, possibly bending it. I’ll find out when I try it. The Gen 2 Pipe Adapter worked great with all the J-mounts I tried, I’m not as hopeful with Gen 3.
I have installed dozens using the g2 pipe adapter & agree it is a well designed product.
You comment “just has one screw, and only bites maybe an inch or so of the pipe” – it actually ‘bites’ no more than 3/8″ below the top of the mast maybe closer to 1/4″.
Others have suggested to simply drill a hole in the mast for the bolt but the design requires the bolt to PUSH AGAINST the mast. I started to work on a hack to do just that and it became clear to me that would be an even worse way to use the adapter. I suppose drilling the hole and getting a longer bolt that would go all the way thru the mast and push the rear of the mast against the back of the adapter…
Bob
Hope Starlink comes up with a revision, extending the bolt another 1/2″ or better further down the mast.
Hi Noah. was a proxicast J-mount review ever published? I was searching around and dont think I found one. I’m curious about a alternative’s to the Starlink wall mount. My only pre/early concern with that mount is the lack of a longer extension. A pipe adaptor with 3rd party could work, but you and others point out very valid concern about a single set screw with the pipe adapter. Thats worrisome. My roof is very hard to access, I would prefer to minimize the number of times I need to get up there.
I did a review of the Proxicast and other J-Mounts a long time ago for my Gen 1 dish: https://www.starlinkhardware.com/guide-to-using-a-j-mount-with-starlink/
If you need a longer mast, I suggest going with something like the Winegard DS3000A. Should provide plenty of length for a larger overhang. Regarding the pipe adapter, there are plenty of better 3rd party designs available now. I’m in the process of reviewing this one from FlagPoleBuddy: https://flagpolebuddy.com/products/ols/products/starlink-buddy-mt-kit-gen-iii-adapter-only
Maybe the engineer in my is over thinking this. And I dont yet have the standard mount kit in hand. I like this because it seems most secure where the dishy attaches. Not sure about falgpole buddy. I will have to read more about that.
But I wonder. what about cutting the mast in half then use inserting a new pipe and using some standard piper coupling technique to hold them all together. Essentially just creating a longer mast extension but using the Starlink ends ?
I have not actually installed one yet but did order all 3 mounts as well as the gen3 kit (which I returned yesterday)
I am curious what the reactions will be from the do-it-your-selfers when A) they don’t plug in the cable before snapping in the mounting plate and B) those who need to take it down for one reason or another. Getting the mounting plate to release, especially while on a ladder with minimal slack to work with is not gonna be fun.
Put the kids away while Daddy is trying to take it down cause the four letter words might fly….
It’s actually really easy to release the mount from the dish. It’s easier to release than opening a pickle jar.